Custom Land Cruiser Conversion
Welcome to the third installment in our four-part series Land Cruiser Troopy Camper Conversion. If you're new to the series and want to start from the beginning, click here for Part 1. In Part 3, we take a trip to Southeast Asia, while Alu-Cab installs a custom pop-top roof and R&D Offroad fabricates the interior. What follows is a photo and video pictoral of the fabrication work done while we were away. Thanks to Paul Marsh for the photos and video footage shown below.
From Stock Troopy to Overland Camper
During our travels in Southeast Asia, work inched forward. Juggling multiple projects, R&D and Alu-Cab chipped away at interior fabrication and the pop-top. The pace of progress was slow, which made us happy to be away, but increasingly antsy to get back.
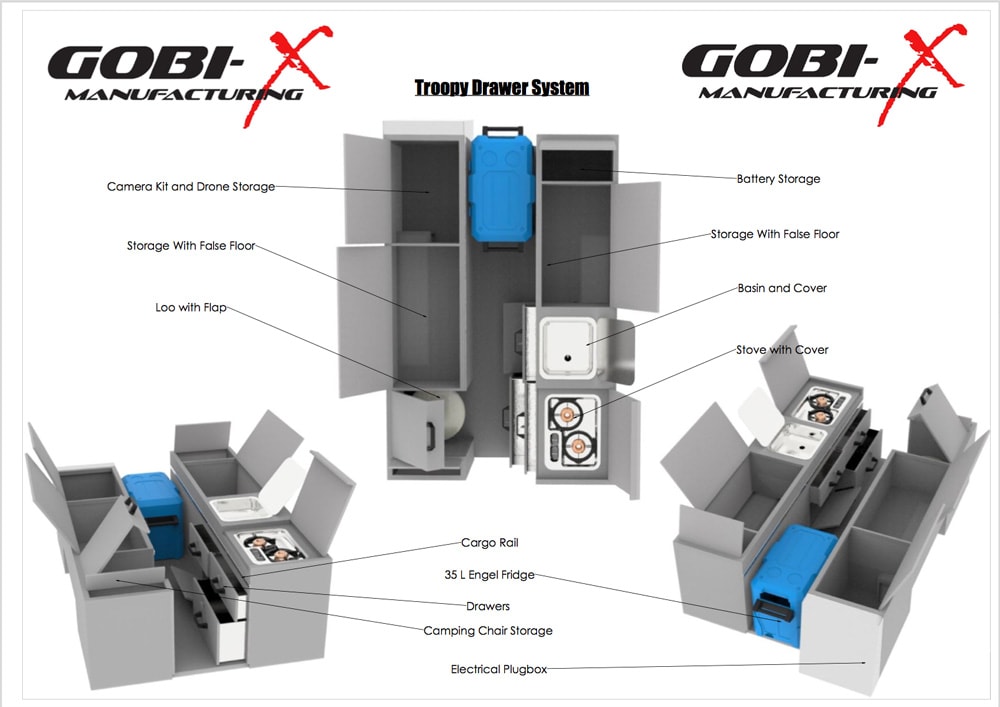
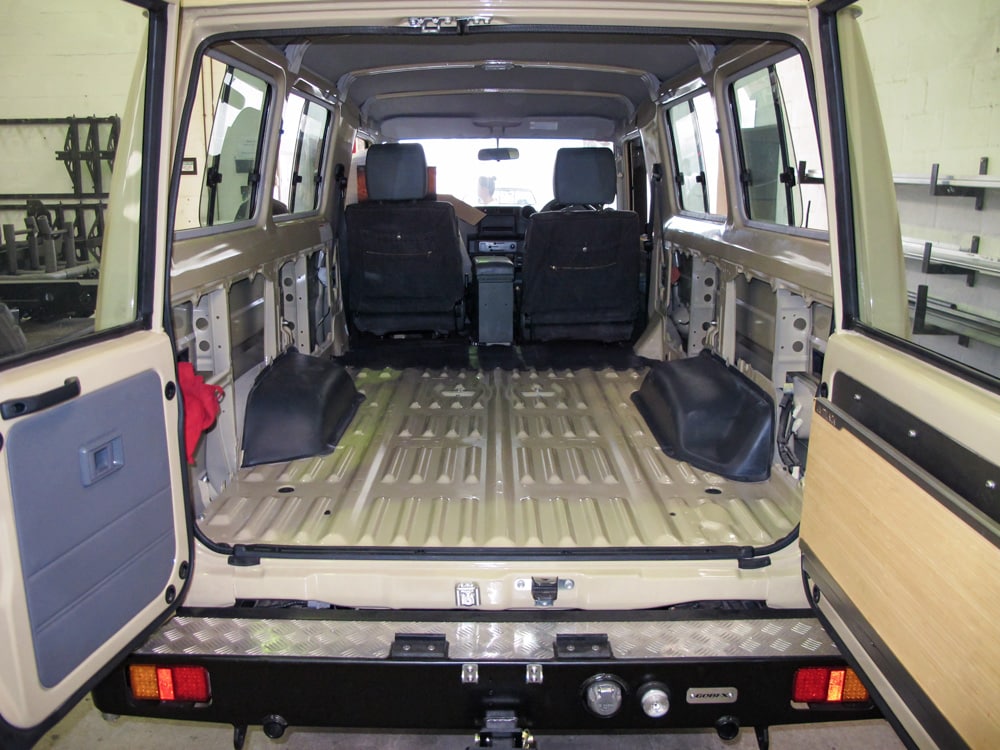
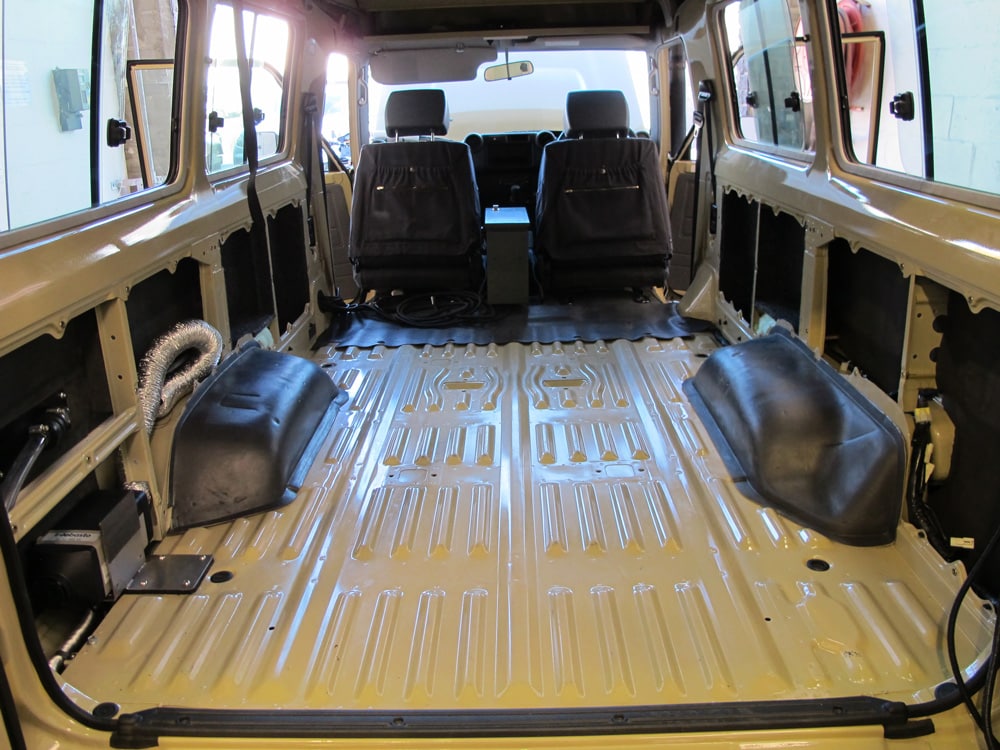
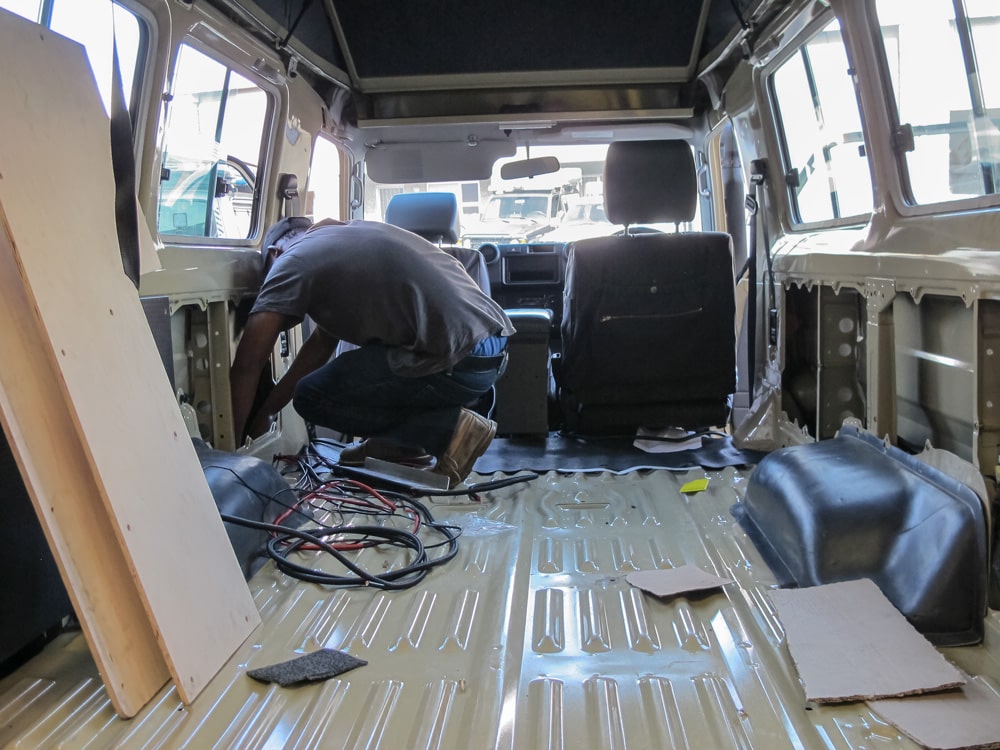
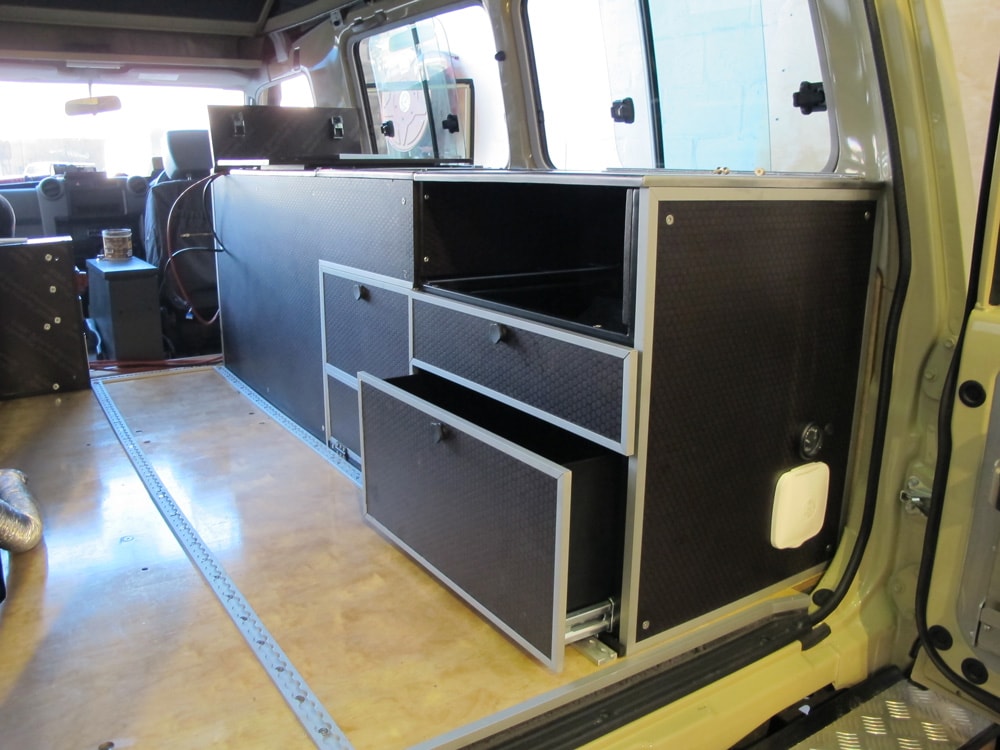
After taking a break for the Christmas holidays, R&D Offroad picked up the project in January - gutting the interior and starting work on the floor, walls, and drawer system. The initial building blocks of what would become our kitchen, toilet, living area, and storage system.
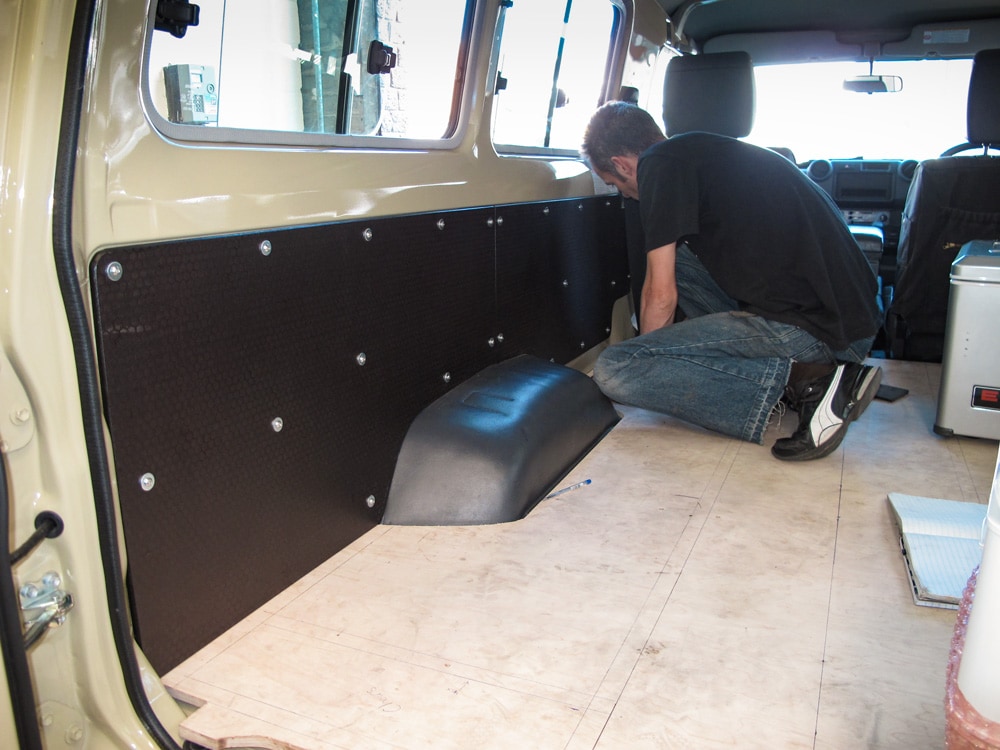
In February, the birch subfloor and walls were cut, fitted, and marked for placement of drawers and other components.
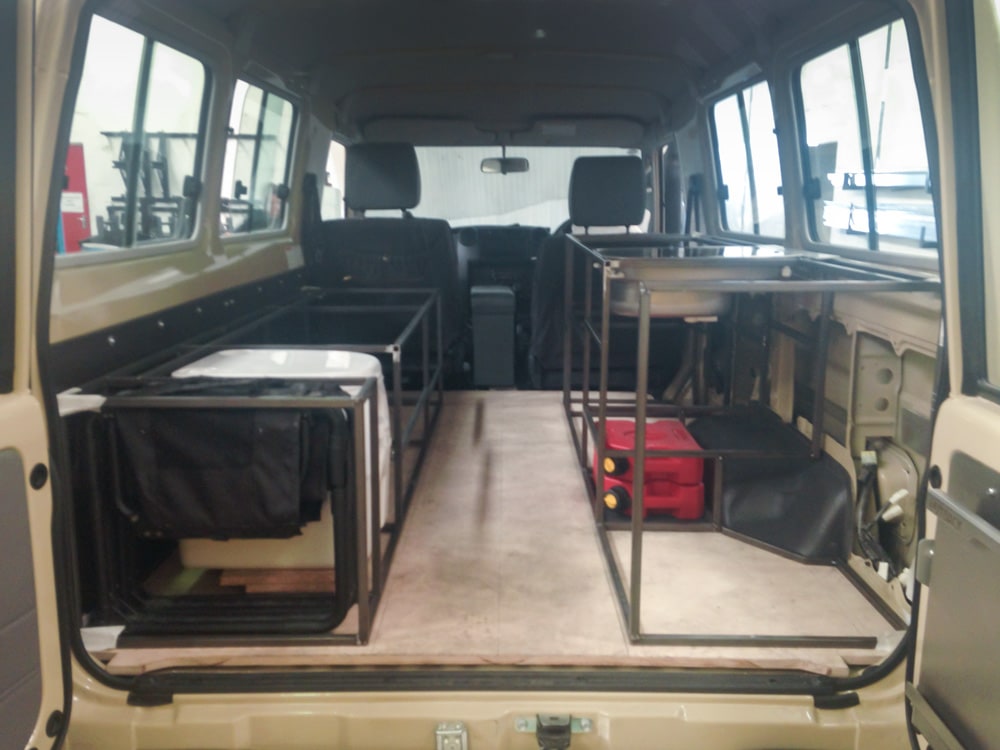
In March, R&D Offroad completed the frame for the drawer system and began the tedious process of ensuring that key components like cooking fuel, house battery, toilet, sink, and camping equipment fit as expected. Fortunately, everything fit to plan and the green light was given to move forward with construction of the drawer system.
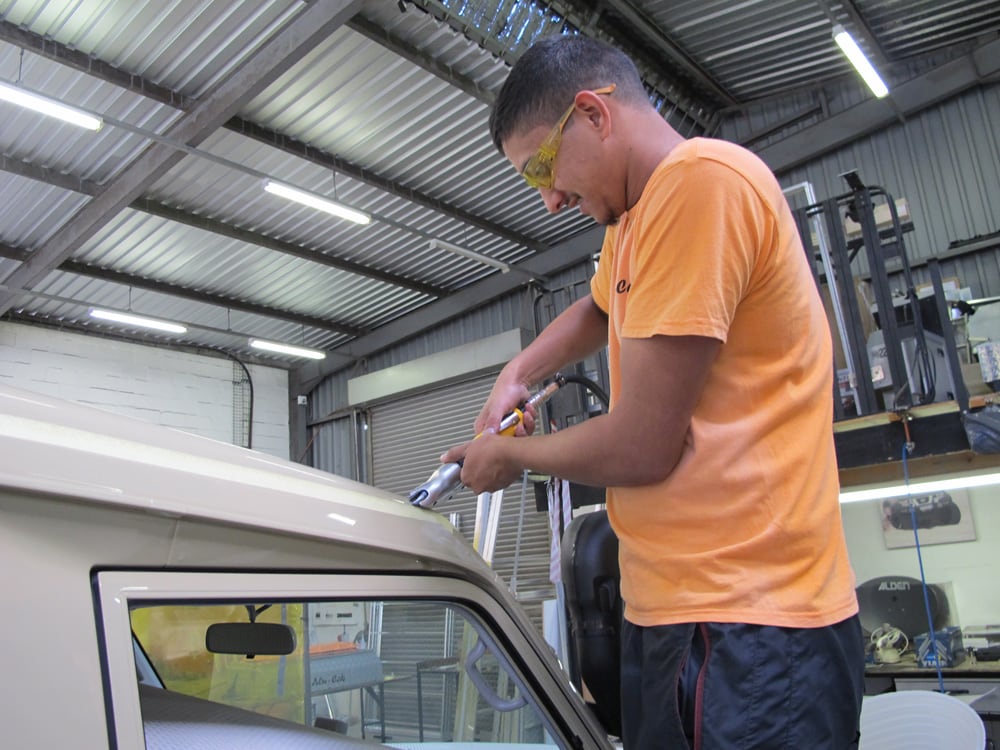
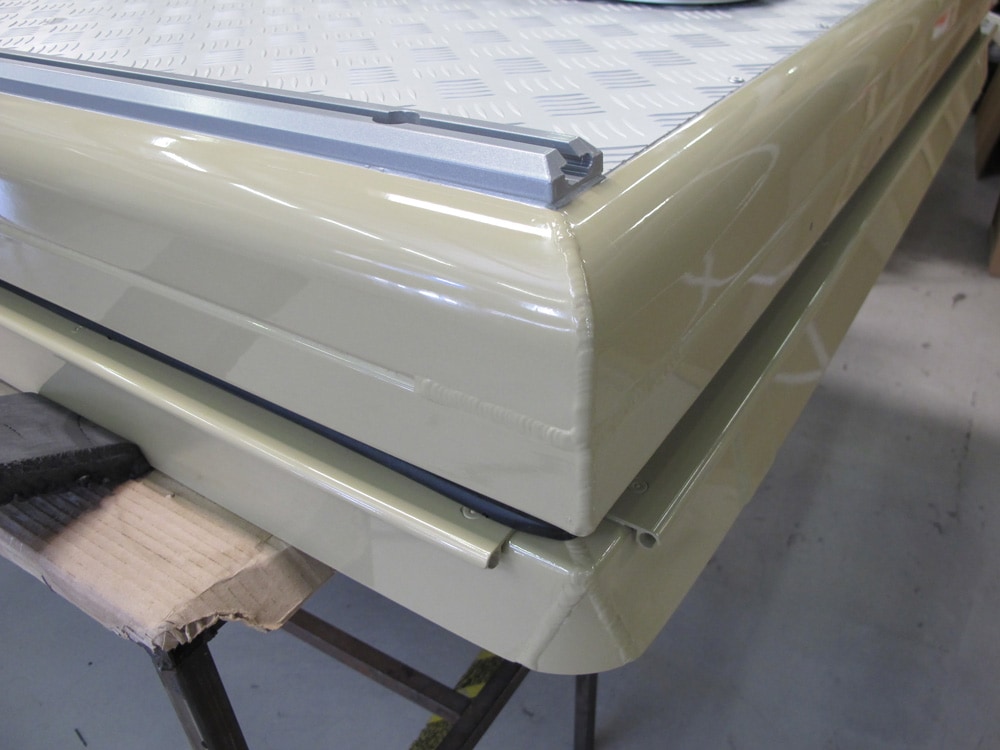
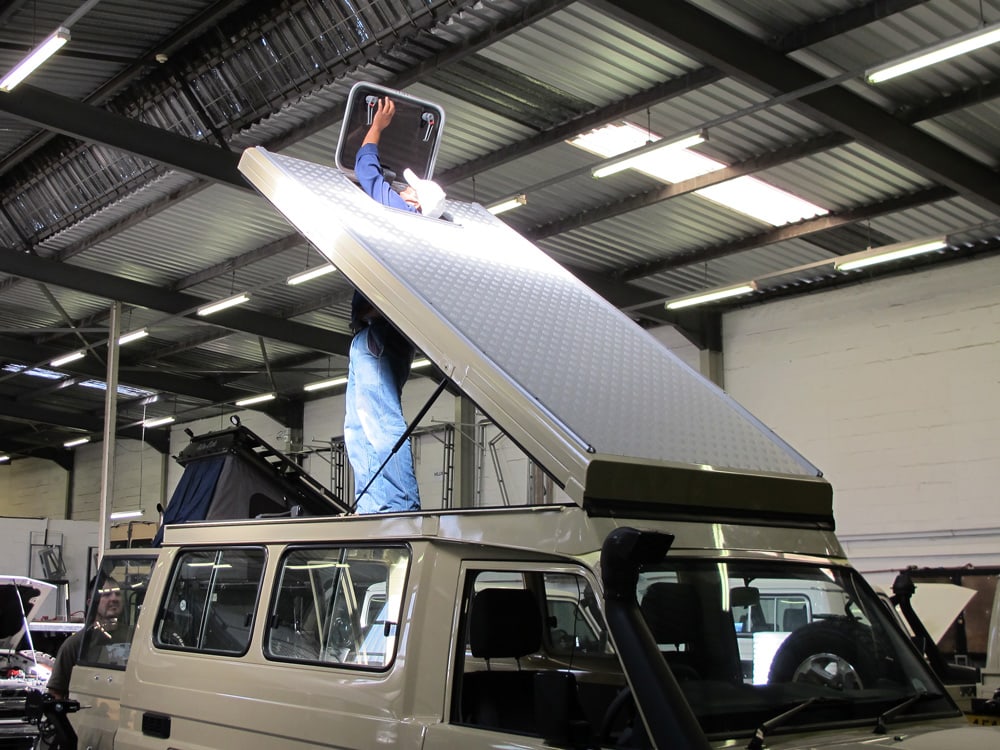
On April 26, a much anticipated and slightly dreaded day finally arrived. It was time for Alu-Cab to install a new pop-top roof, the single most important component in our Troopy's camper conversion. Perhaps it goes without saying, but it was a calculated decision on our part to be absent when our Troopy's perfectly good roof was cut off to make way for the new pop-top. Here's a short video of the procedure.
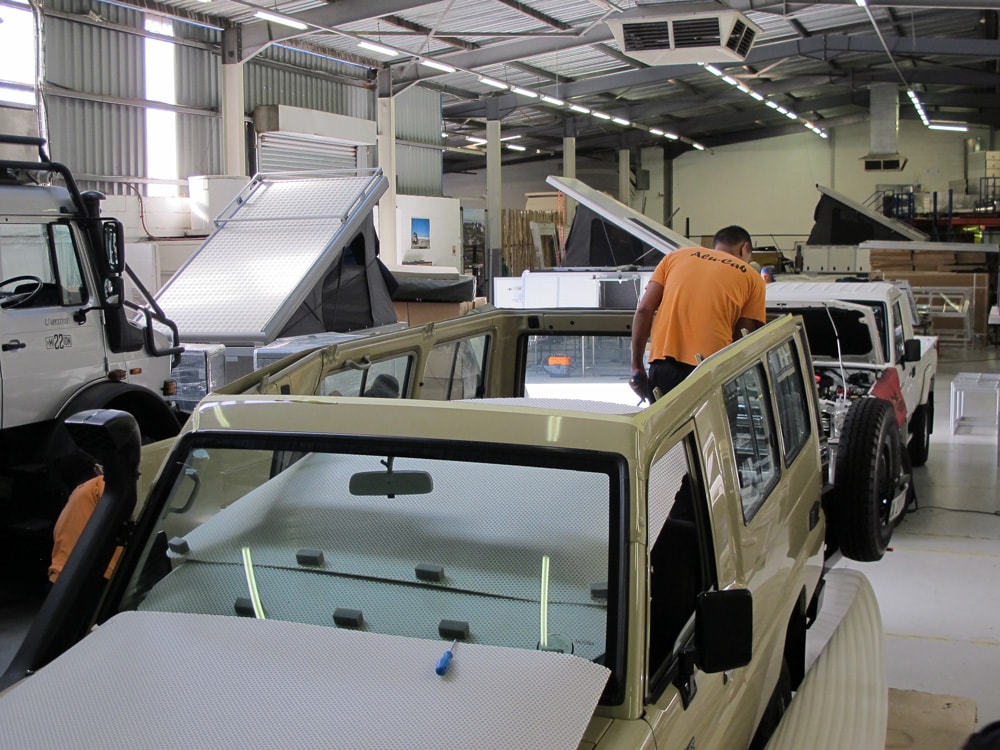
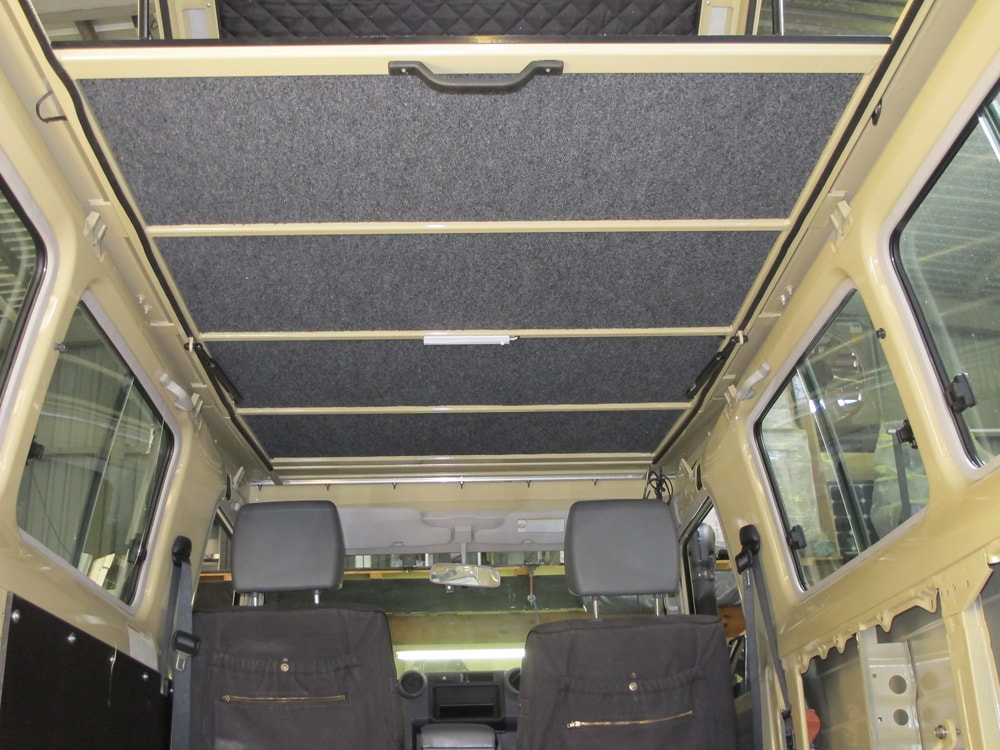
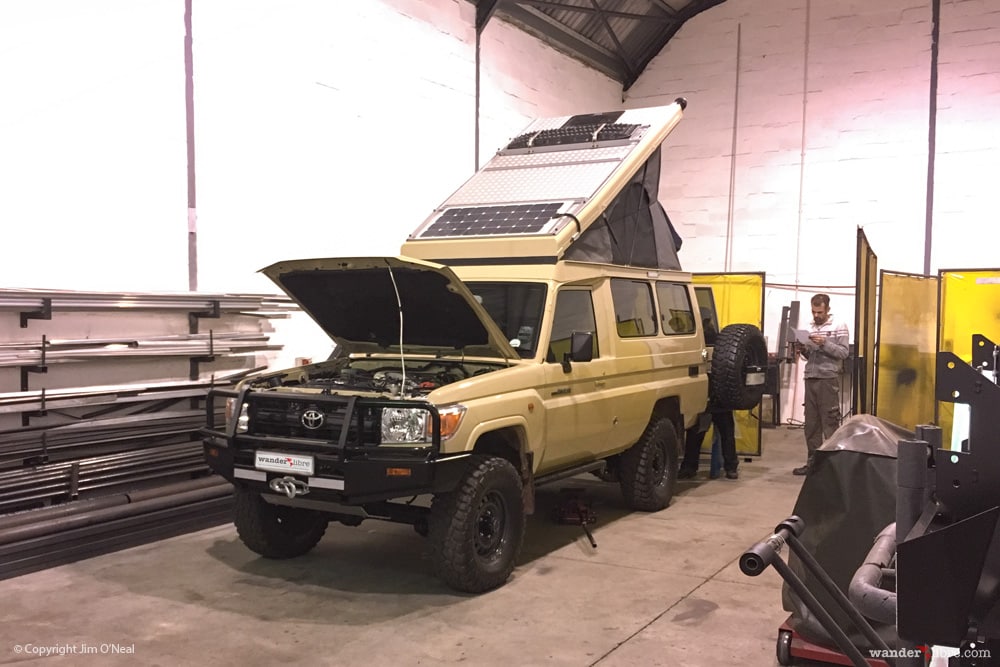
With our new Alu-Cab pop-top roof installed, R&D Offroad was free to move forward with the installation of the interior. By late May, R&D Offroad completed construction of the primary drawer system components and raced to get everything installed prior to our June 8th return to Cape Town.
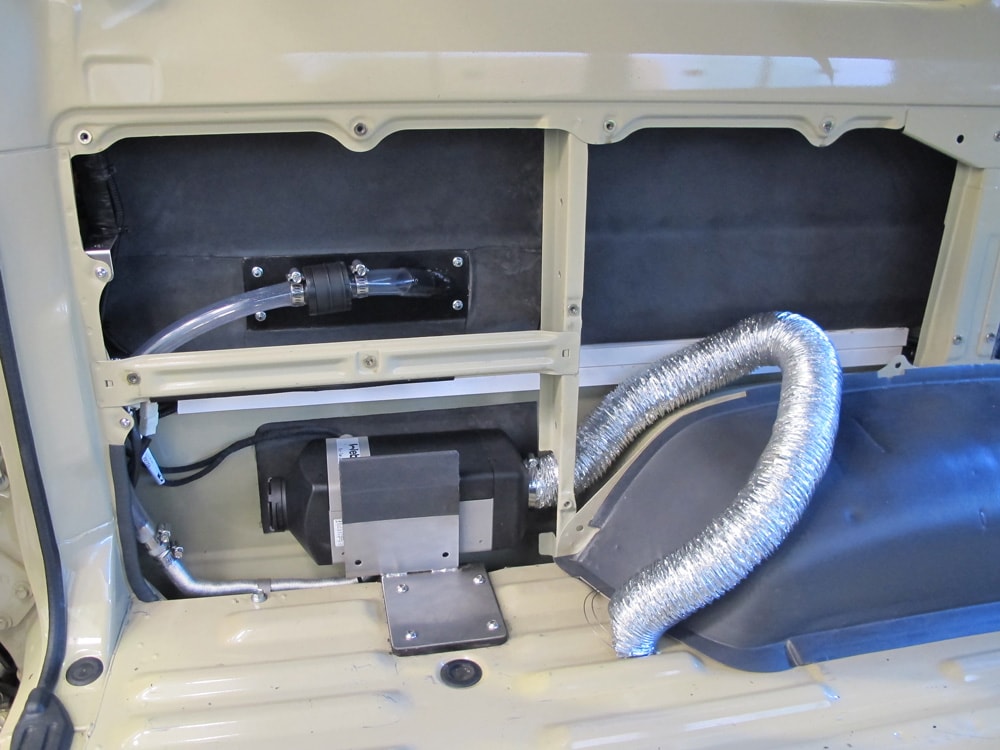
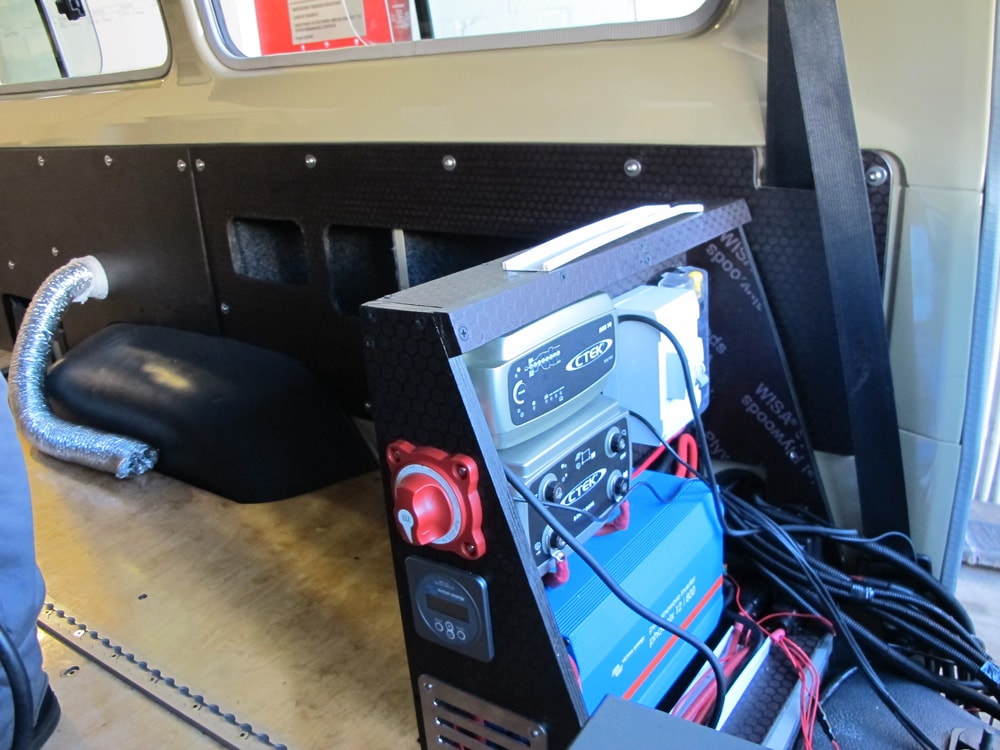
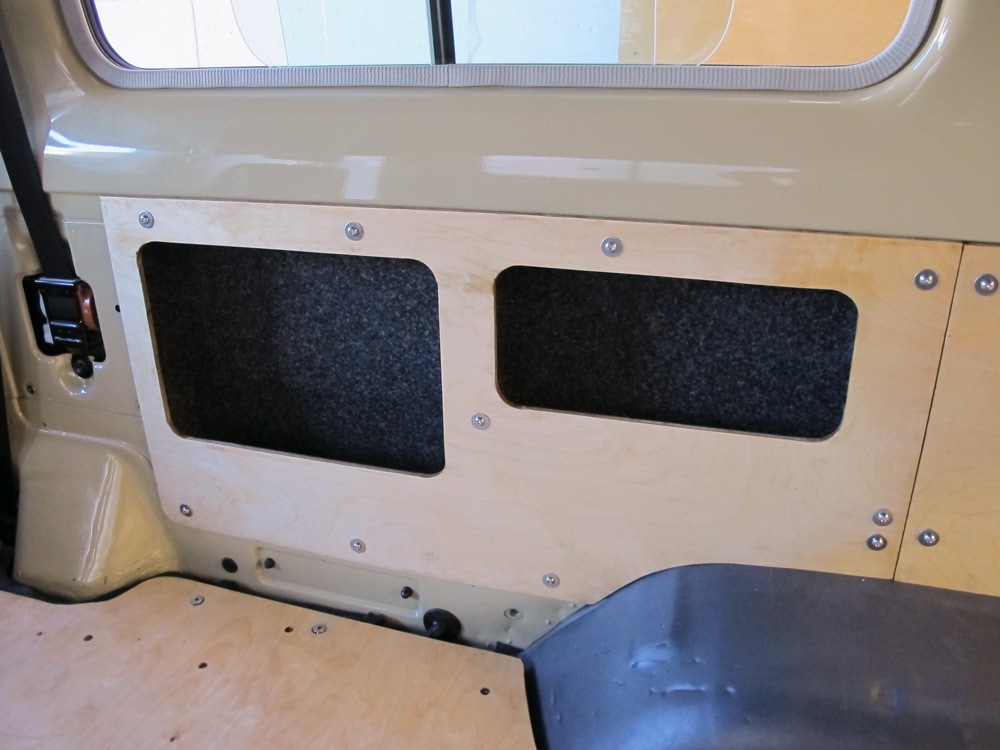
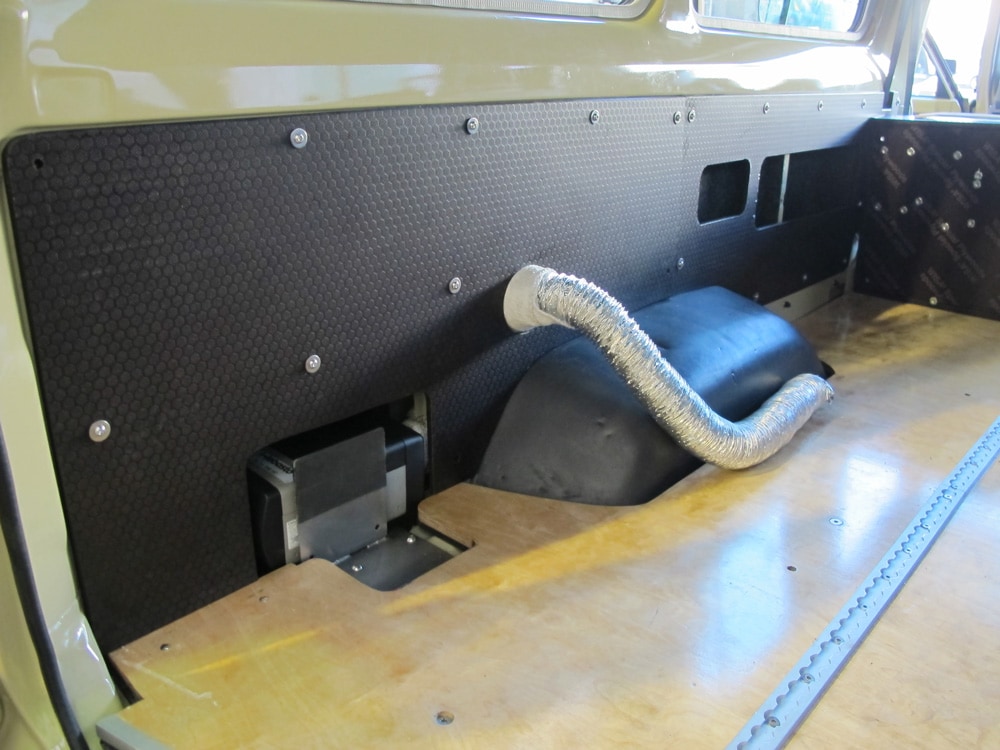
But prior to installing the drawers, much prep work remained including: installing the Webasto diesel heater, insulating the interior, installing storage compartments inside left and right side walls, and wiring for outlets, LED lighting and other electrical components.

With Alu-Cab's roof installed and R&D Offroad's drawer system nearly complete, the second phase of build work was coming to a close. In Part 4, we return to Cape Town to oversee the final two months of the build and prepare for departure. It was the most challenging and exciting phase of the project as we learned just how hard it is to transform ideas on paper into the polished end product we imagined at the start of the build.
To read the other posts in our Toyota camper conversion series, click on the following links:
Land Cruiser Troop Carrier Conversion Part 1
Wow guys! This is incredible. I didn’t know until I started reading this that I need a land cruiser. 🙂
Thanks! Glad we can provide a little inspiration. This is our 3rd Land Cruiser and we love each one even more than the last.
Hi Jim
Congratulations to your troopy conversion. We are planning to do something very similar in Australia next year. I have the same problem: there are not much floorplans around for planning ahead. Maybe you can share some of your measurements. Do you have the measurements of the mockups? I think I will create a kitchen with lot of drawers on the right side and let the left side completly empty for some sort of „modular living space“ with airline rails on the floor. Any drawings or sketches would be very appreciated.
Hi Dan,
Thanks for reaching out. Glad to hear you’ll be working on your own Troopy build soon! We get a number of requests for our build specs, so we have a full set of measurements that we can offer for sale. If you’re interested, send me a DM and we can discuss further.
Hi Jim… and Dan too
I’m in Australia and I’m also interested in your measurements for my Troopy conversion that I’ll be starting next month. Would you mind also send me a copy?
Also I’m finding it difficult to choose a GVM dealer… I understand what it is but there are so many to choose from. Who did you use?
Many thanks
Jo
Hi Jo. Thanks for reaching out. I’m sending a private message to your email address.
Hi Jim,
Just stumbled on your website, I too have recently purchased a Troopy here in New Zealand.
Looking at possibly doing the Alucab roof conversion, as it looks to make the whole unit so much more usable.
However I’m particularly interested in your Webasto heater installation, what a great location to stick it – I hadn’t thought of using that wasted space until now!
Can I ask, in the photo I’m assuming that you have used the side grill as the combustion air intake, and are you feeding the exhaust underneath the vehicle through a cut out in the floor?
Any feedback on how your unit is working for you would be gratefully received, before I start cutting holes in mine.
Cheers Pete.
I’m sorry that I’m just seeing this. Congrats on your Troopy purchase! You are correct – we used the side grill for the air intake and cut a hole in the floor for the exhaust. If you’re doing water crossings, be sure to cover the exhaust! The unit has worked great so far – no problems.
Hi Jim,
I saw that you offer the measurements of the conversion for sale. I would be interested, could you please send me a private email regarding prices for the plans and measurements of the cabinets?
Thanks from Australia
Pierre
Hi Pierre. We sent you an email to your gmail account. Please let us know if you didn’t get it.